

Build your first app with Kai
Build and publish a Keboola app in about 10 minutes — describe it to Kai, preview the live draft, publish to production. Plus prompting tips, the approval model, and manual creation.
Kai builds a working app from a plain-language description — no coding and no Git account needed. From one chat it reads your governed data, writes the code, and opens a live draft you can preview, refine, and publish. This walkthrough takes you from nothing to a live, published app in about 10 minutes, and covers the details you’ll want next: how to prompt, what Kai asks before touching your project, how drafts become production, and the manual creation path on the same screen.
Apps go well beyond dashboards — the same steps produce internal tools, data narratives, or anything interactive. This page builds a simple dashboard so you can learn the flow.
Before you start
You need
- A Keboola project on a stack where Kai is available.
- Kai, the Kai Agent button in the project's top bar, on supported stacks. The first time, an organization admin switches it on; see Get started with Kai.
At least one table in Storage. Kai reads your data directly, so it works with whatever you already have. No data yet? Download the sample opportunity.csv and attach it in Kai’s chat with Upload files; Kai loads it into a table in the
in.c-uploads-from-Kaibucket.- A few minutes.
Step 1 — Open Apps and start a new app
Section titled “Step 1 — Open Apps and start a new app”In your project, open Apps from the left navigation, then click Create app. A project with no apps yet has no such button: its Apps page opens on Build web apps from your Keboola data, with a Describe what you want to build prompt that does the same job as Build with Kai. In that case, use that prompt for Step 2.

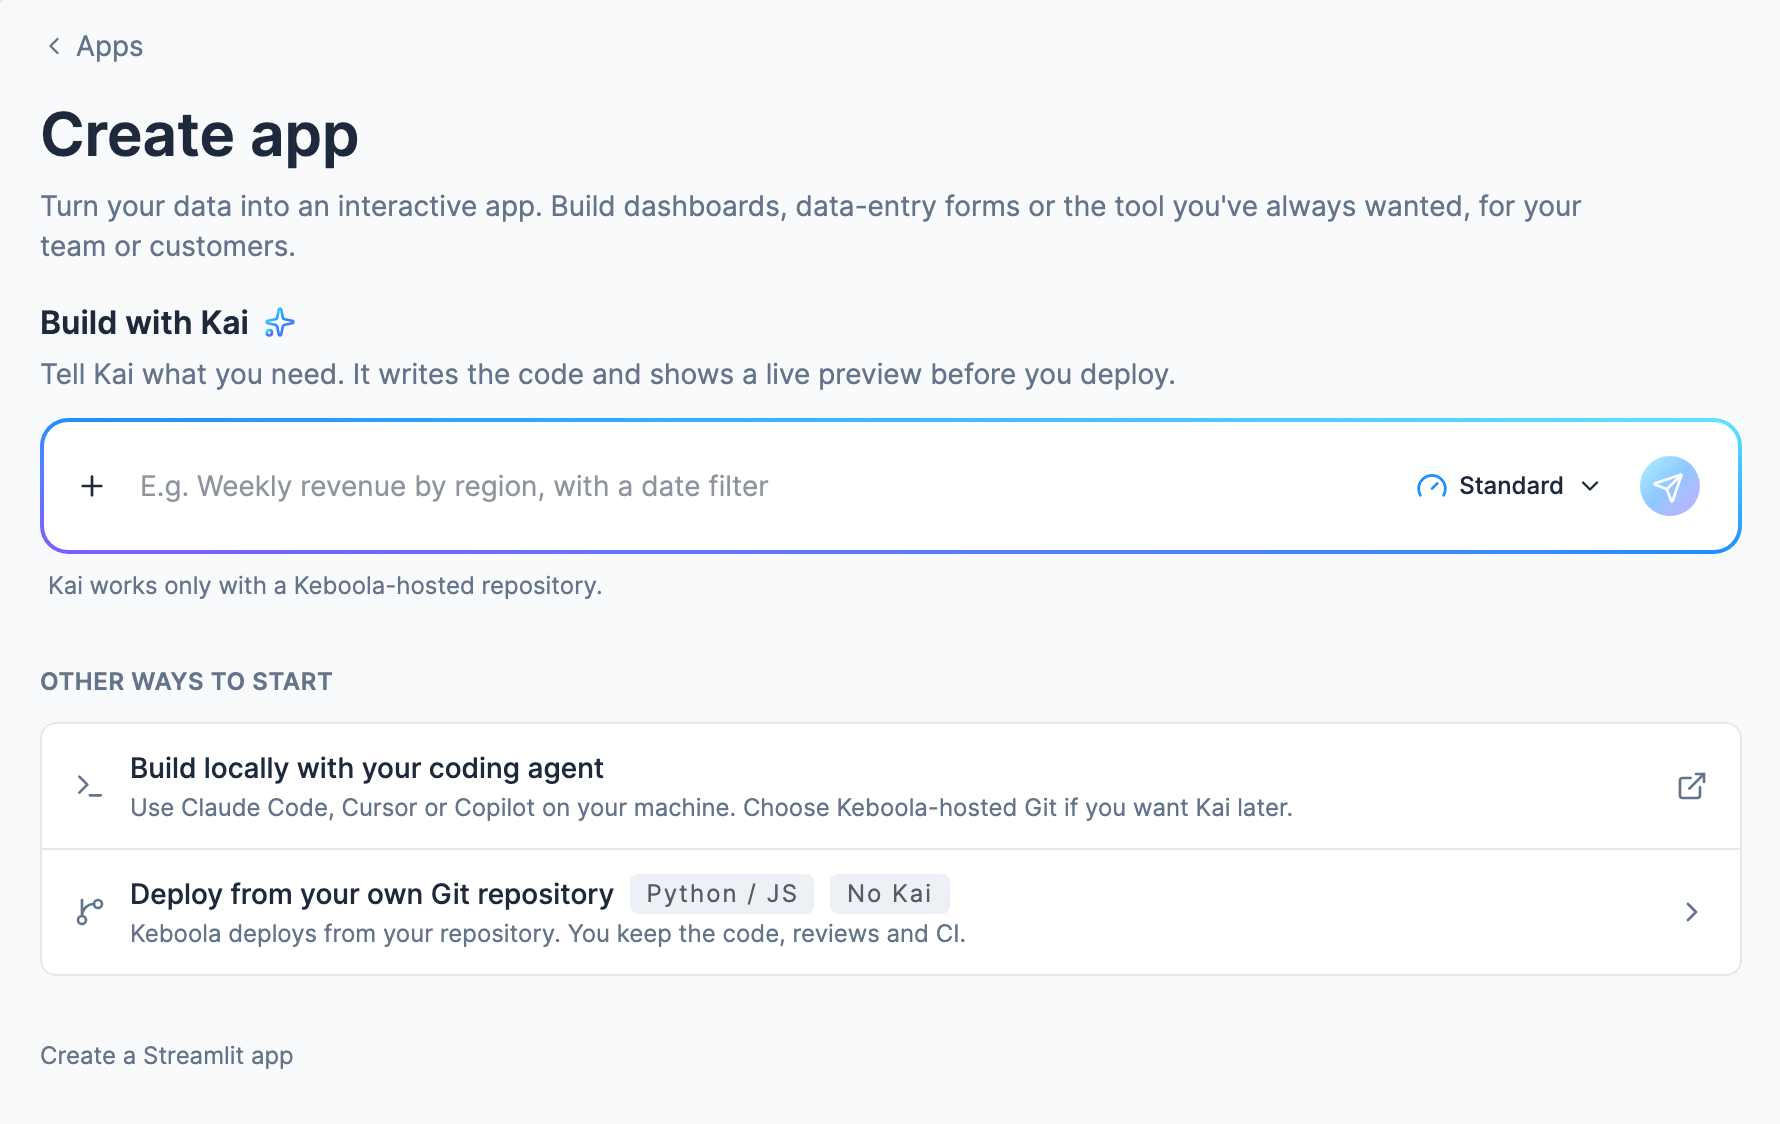
You land on the Create app screen. It leads with Build with Kai, a prompt box where you tell Kai what you need. Below it, Other ways to start links to building locally with a coding agent and to the manual routes, for when you’d rather set things up yourself. (The Kai Agent chat anywhere in your project works too.)
Step 2 — Describe the app you want
Section titled “Step 2 — Describe the app you want”Type what you want in plain language. The clearer your prompt, the closer Kai’s first version lands — name three things: the data, the audience, and the main action you want people to take. For example:
Build a simple dashboard from my Storage data: a title, three key metrics as big number tiles, and one bar chart. Keep it clean and easy to read.
The more specific you are — which tables, which charts, who it’s for — the less you’ll need to refine afterward.
Step 3 — Watch Kai read your data, verify it, and ask for your approval
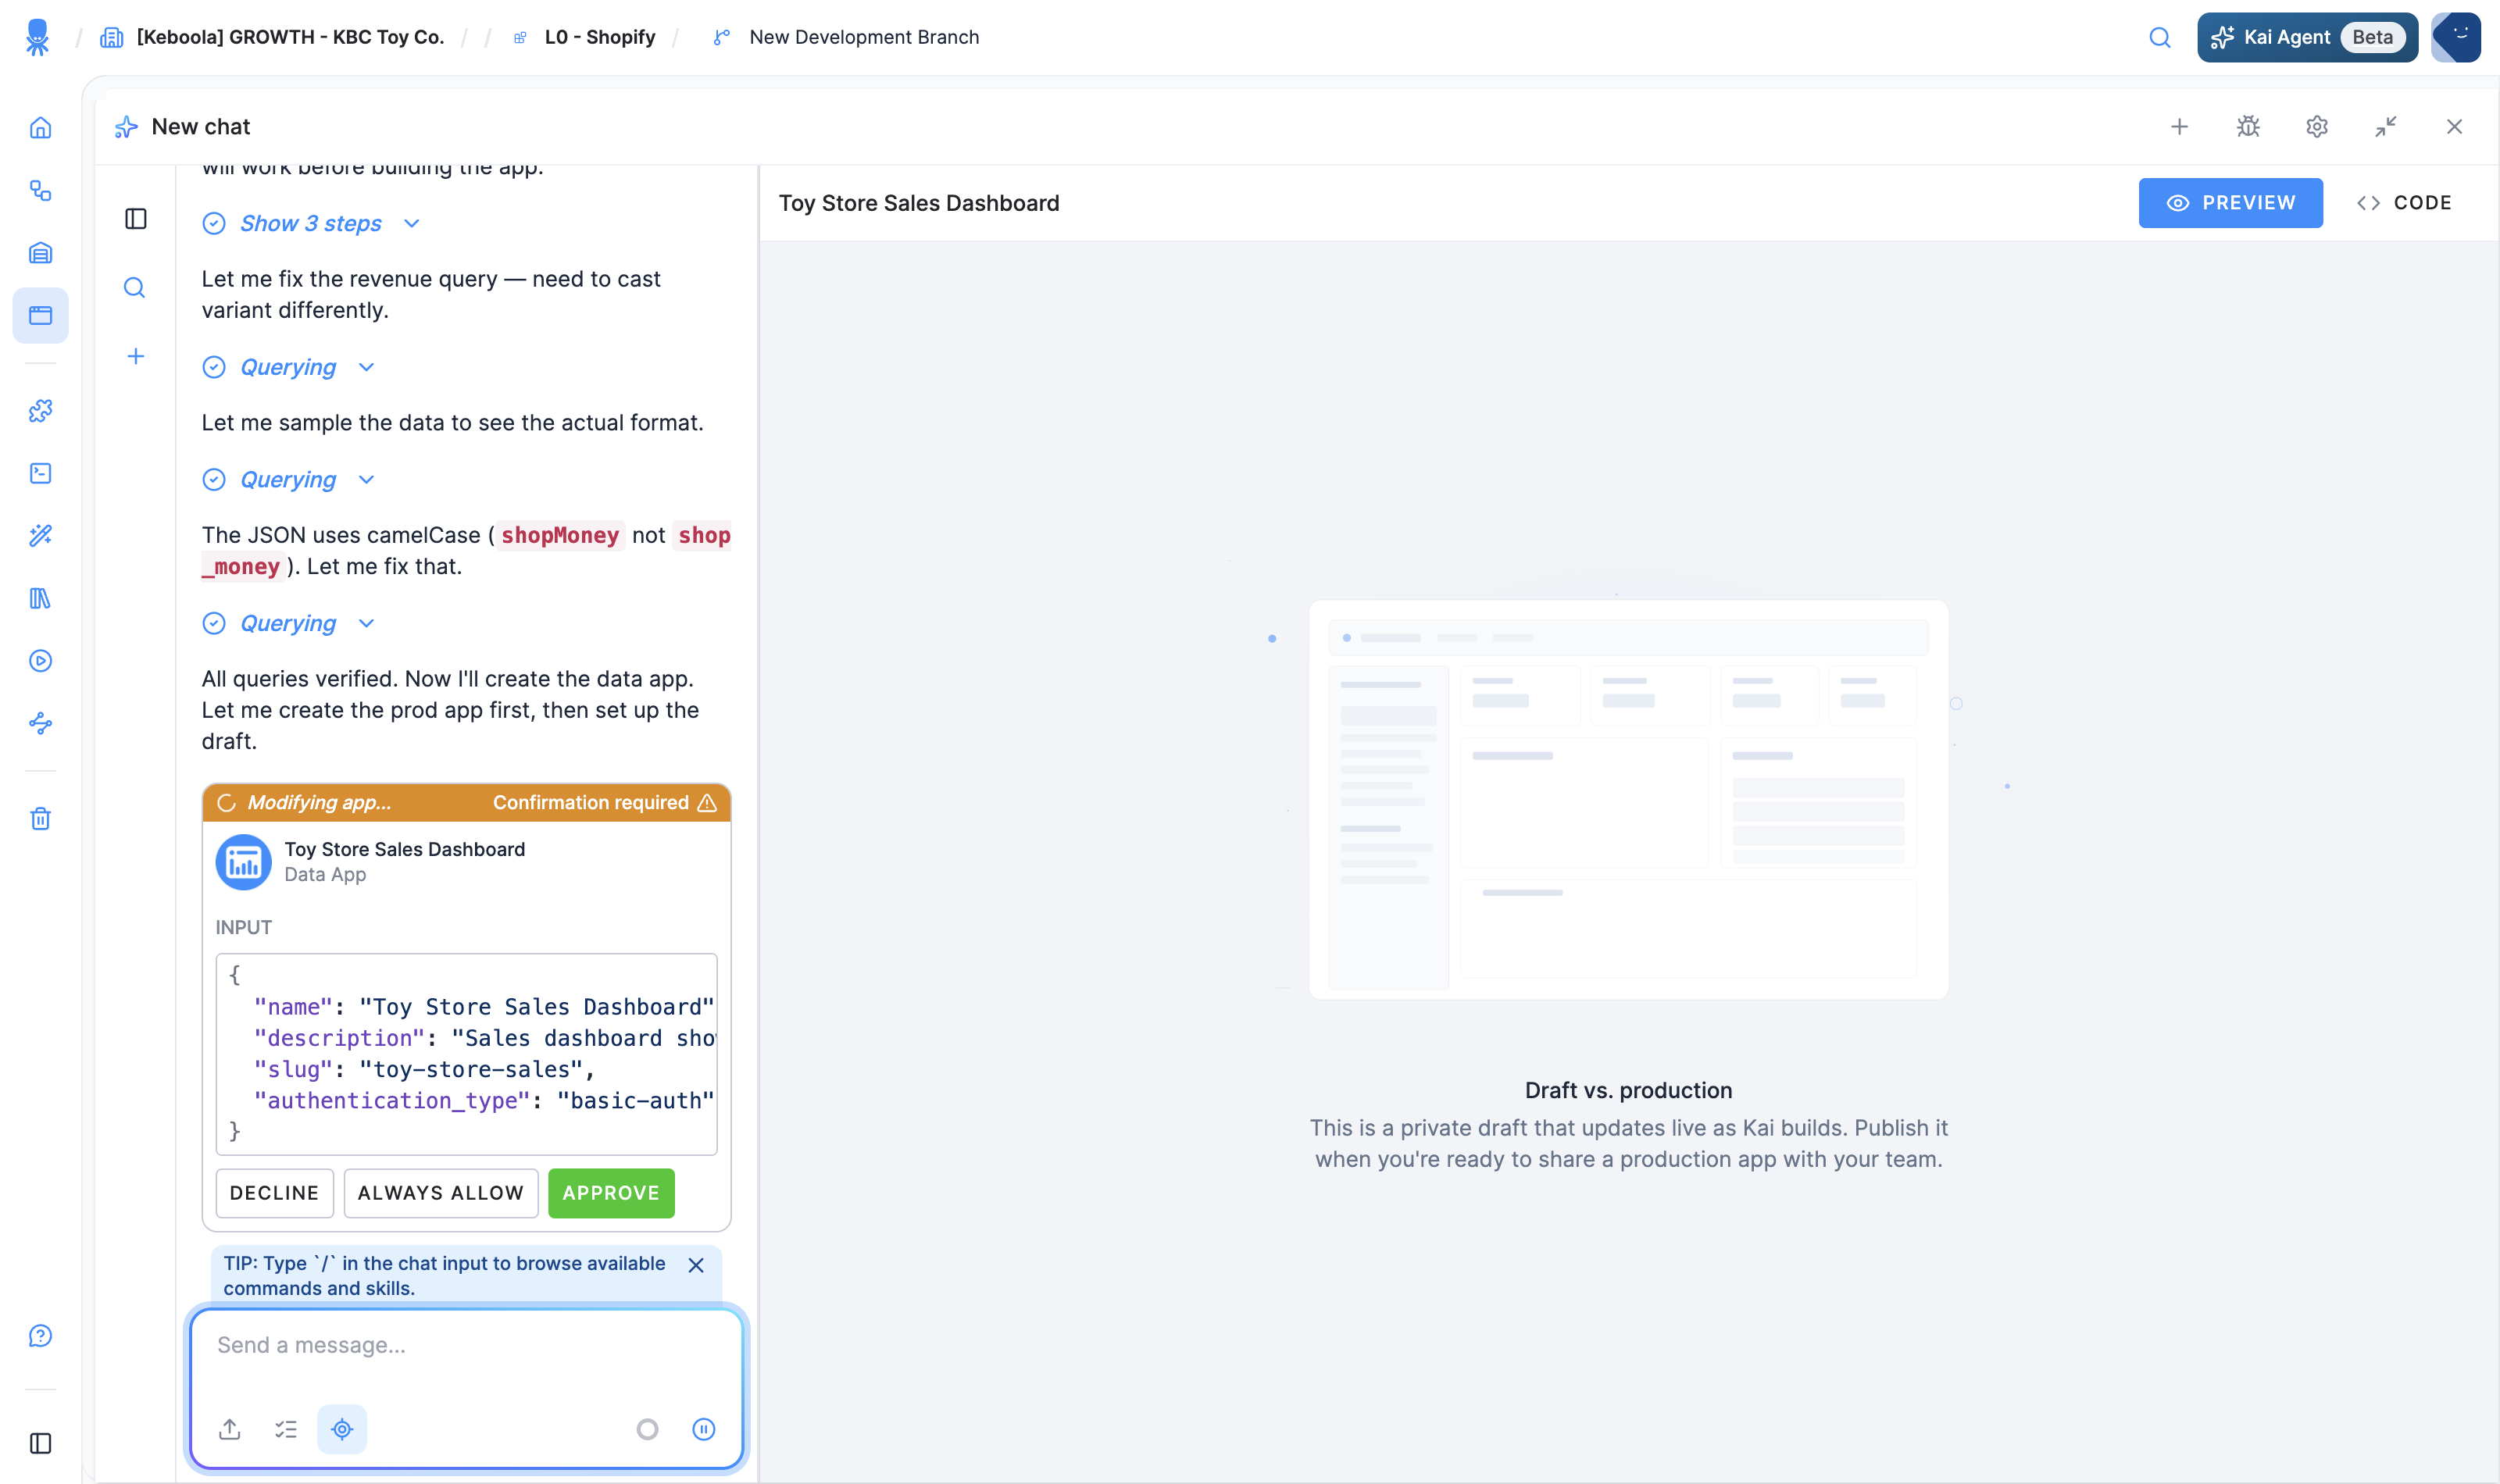
Section titled “Step 3 — Watch Kai read your data, verify it, and ask for your approval”Kai gets to work. It explores your Storage on its own — listing buckets, reading table details, even sampling the data to verify its queries will work. Then, before creating anything in your project, it shows a Confirmation required card with the exact app configuration — name, description, and authentication type — and waits for your Approve (or Decline; Always allow skips this prompt for future builds).
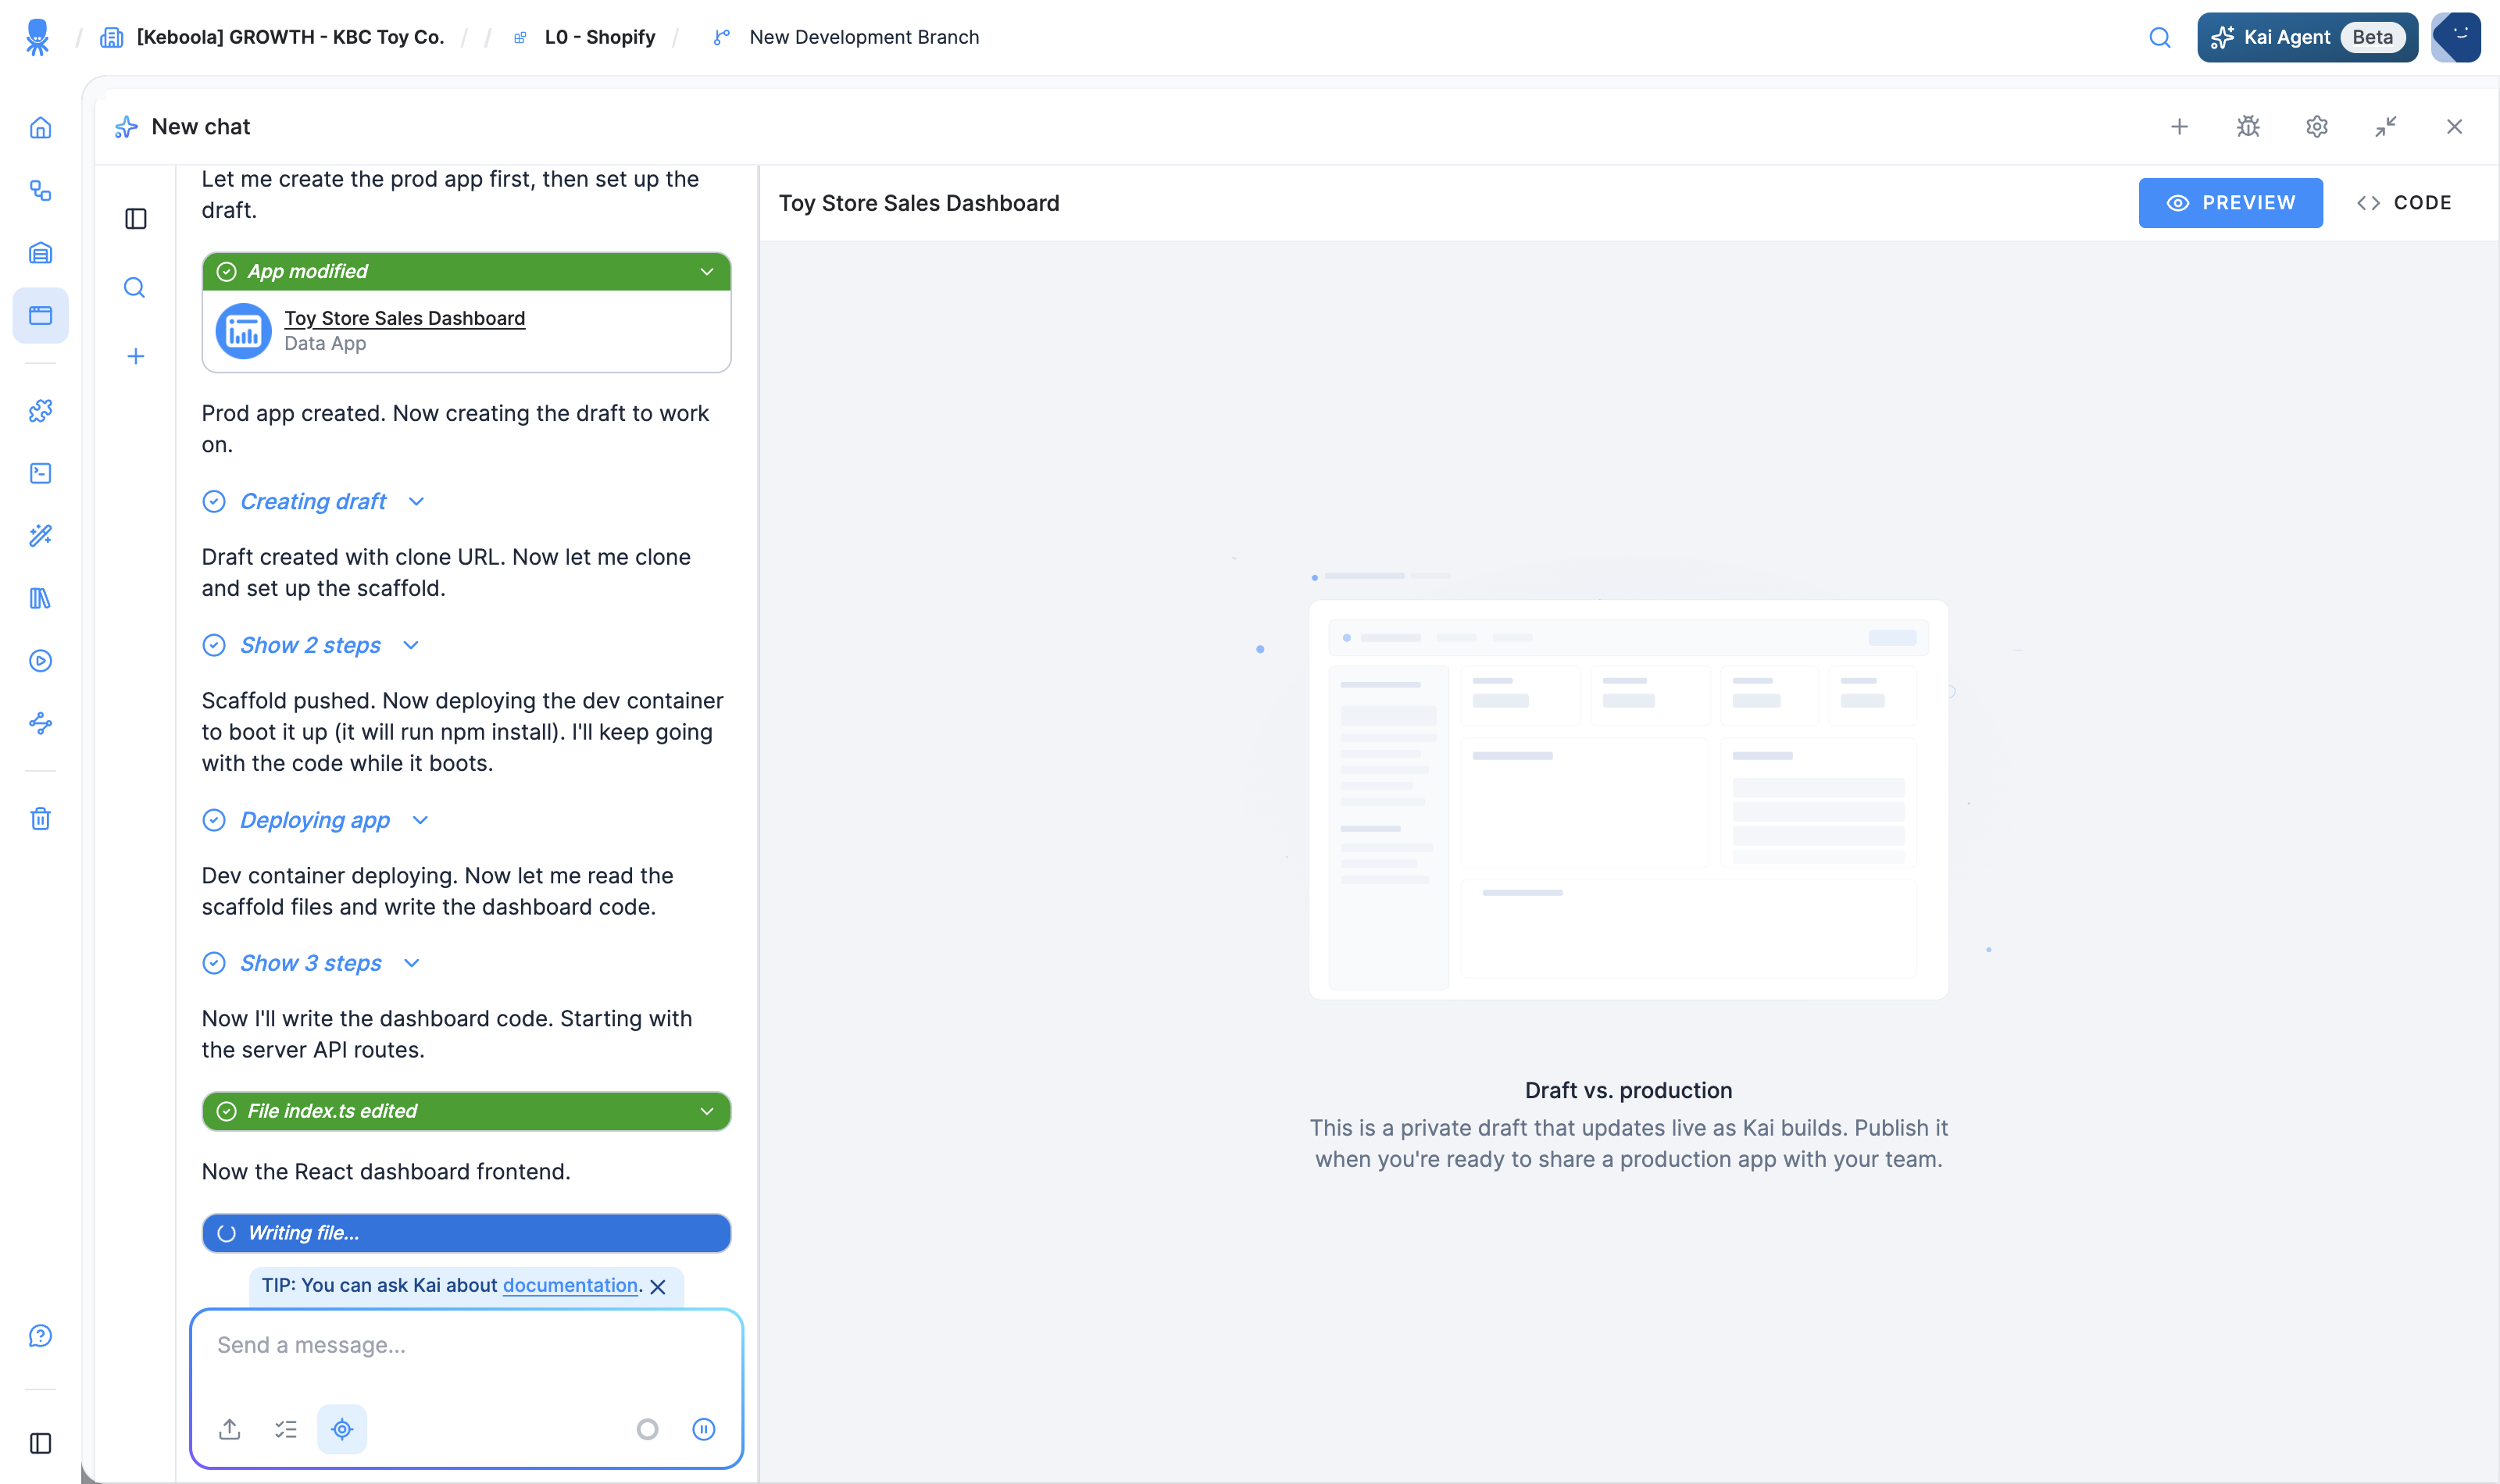
After you approve, Kai creates the app, sets up a private draft, and writes the code — you see each step in the chat (File index.ts edited, Writing file…) while it deploys a development container.
In our run, Kai found the project’s Shopify tables and built a Toy Store Sales Dashboard: total orders, revenue, and customers as tiles, plus a “top products by orders” bar chart.
Step 4 — Preview the draft and refine it
Section titled “Step 4 — Preview the draft and refine it”The build runs in a split-screen builder: your chat with Kai on the left, and the app as a draft on the right — toggle between a live Preview and the Code view of its files. As the product puts it, this is “a private draft that updates live as Kai builds” — it hot-reloads as Kai edits and doesn’t touch anything you’ve shared.
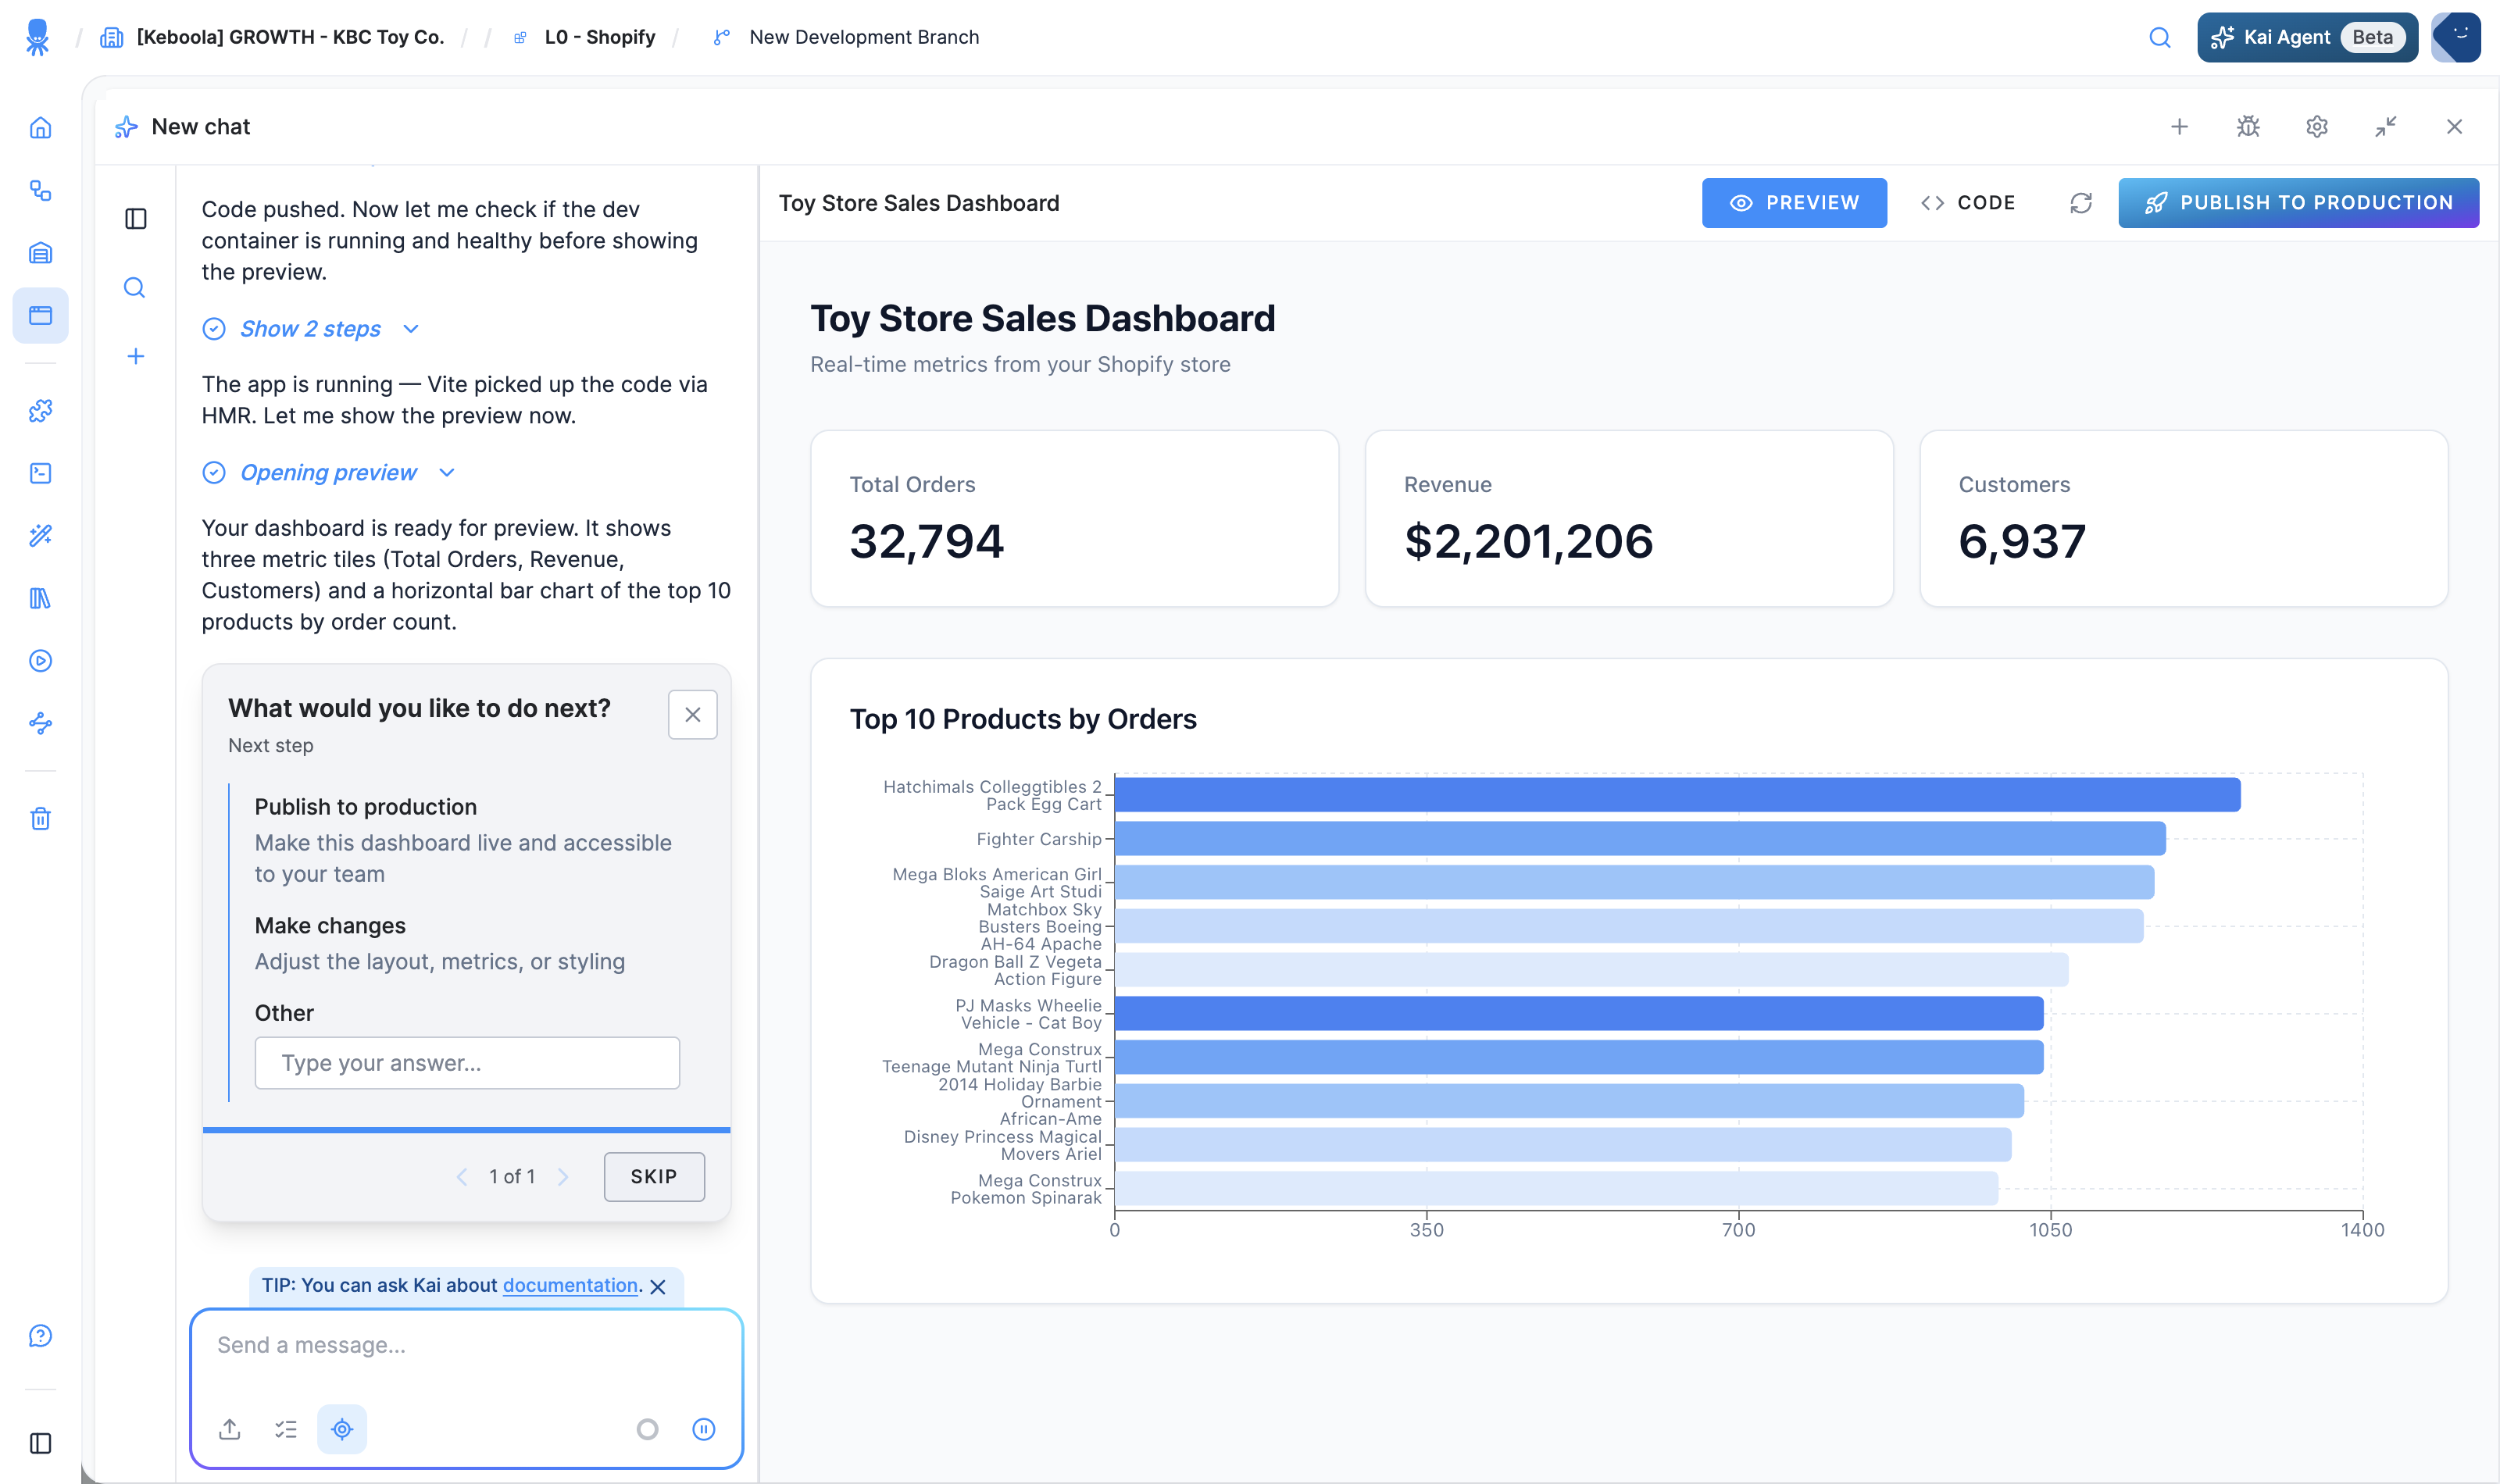
Kai’s first version is a starting point, not the final word. Keep chatting to change it — a different chart, another metric, a new filter, a cleaner layout — in as many rounds as you need. Kai finishes each round with next-step suggestions: Publish to production, Make changes, or type your own.
Step 5 — Publish to production
Section titled “Step 5 — Publish to production”When you’re happy with the draft, click Publish to Production. Kai merges the draft into the app’s main branch, deploys the production app, and cleans the draft up. The app turns Active and is available at its own URL — and Kai’s final message hands you the App URL, the password, and an Open App button.
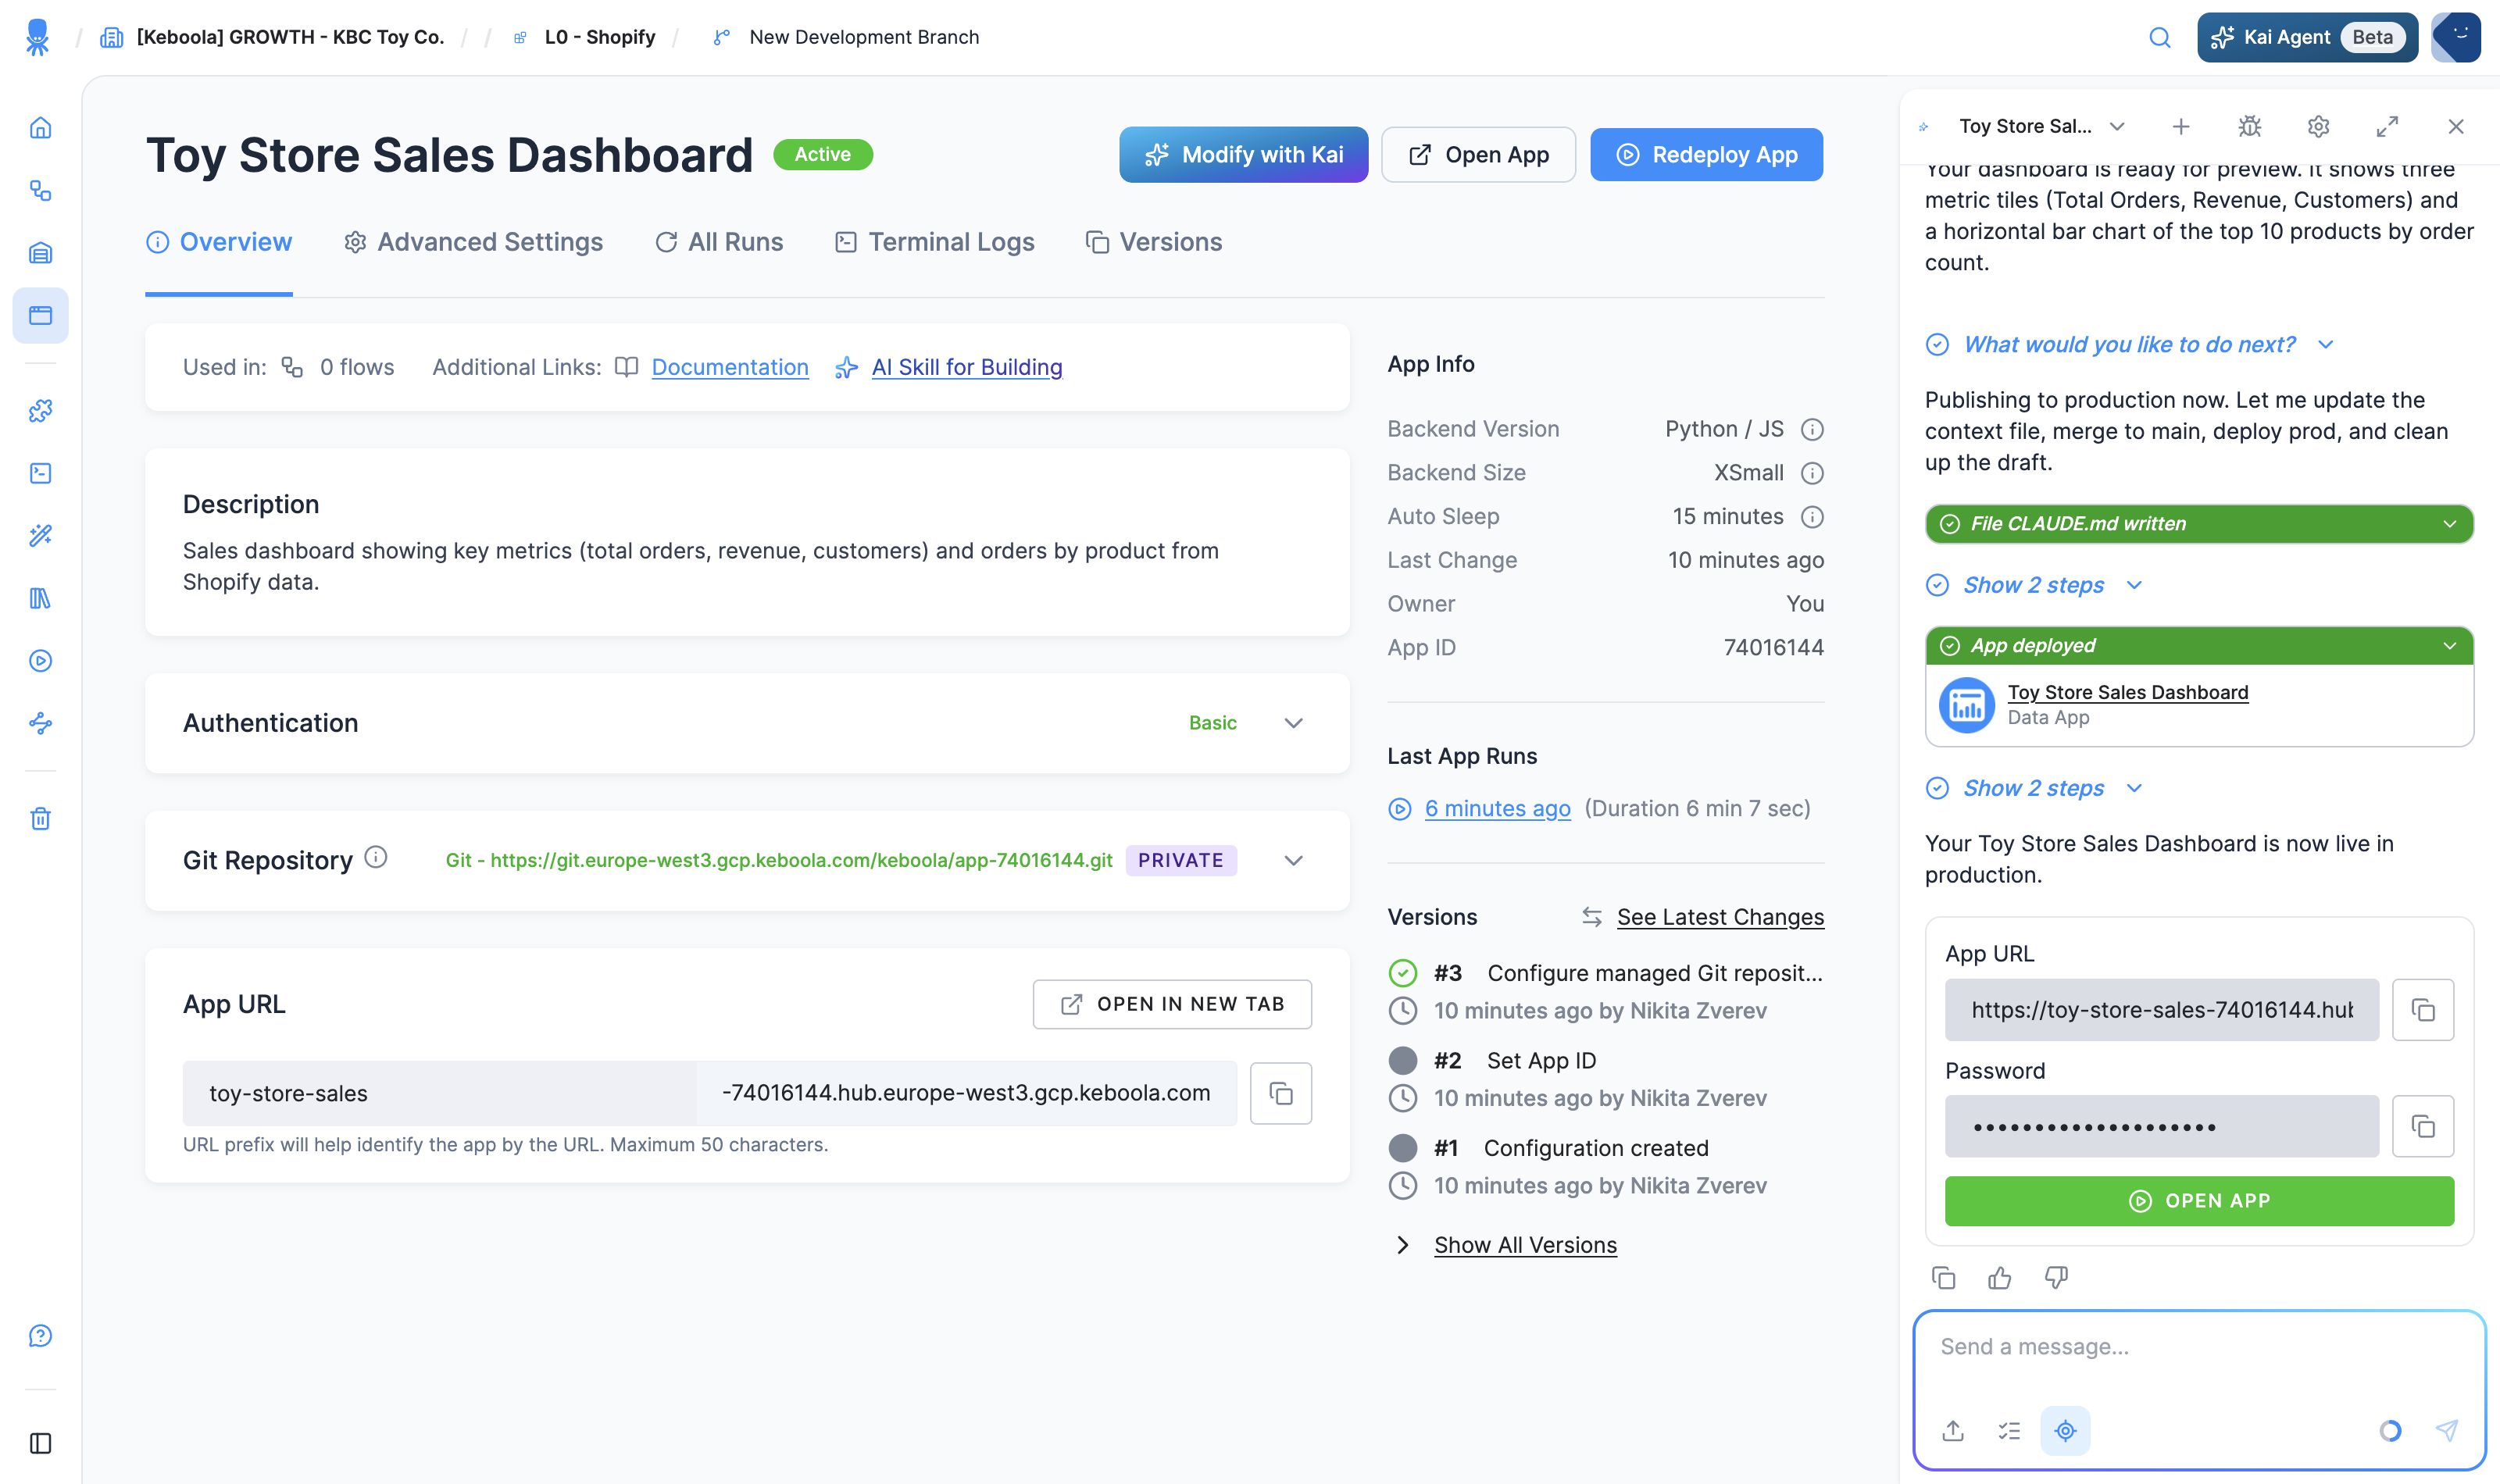
By default the app is protected with Basic (Password) authentication. The generated password is also on the app’s configuration page: copy it from the Password field in the App access card on the Overview tab, or click Open in the page header and copy it from the dialog.
To change who can access it (public, a password, SSO, GitHub, and more), see Authentication.
Open the URL, enter the password, and your app is live — running on your governed data, served from its own address:
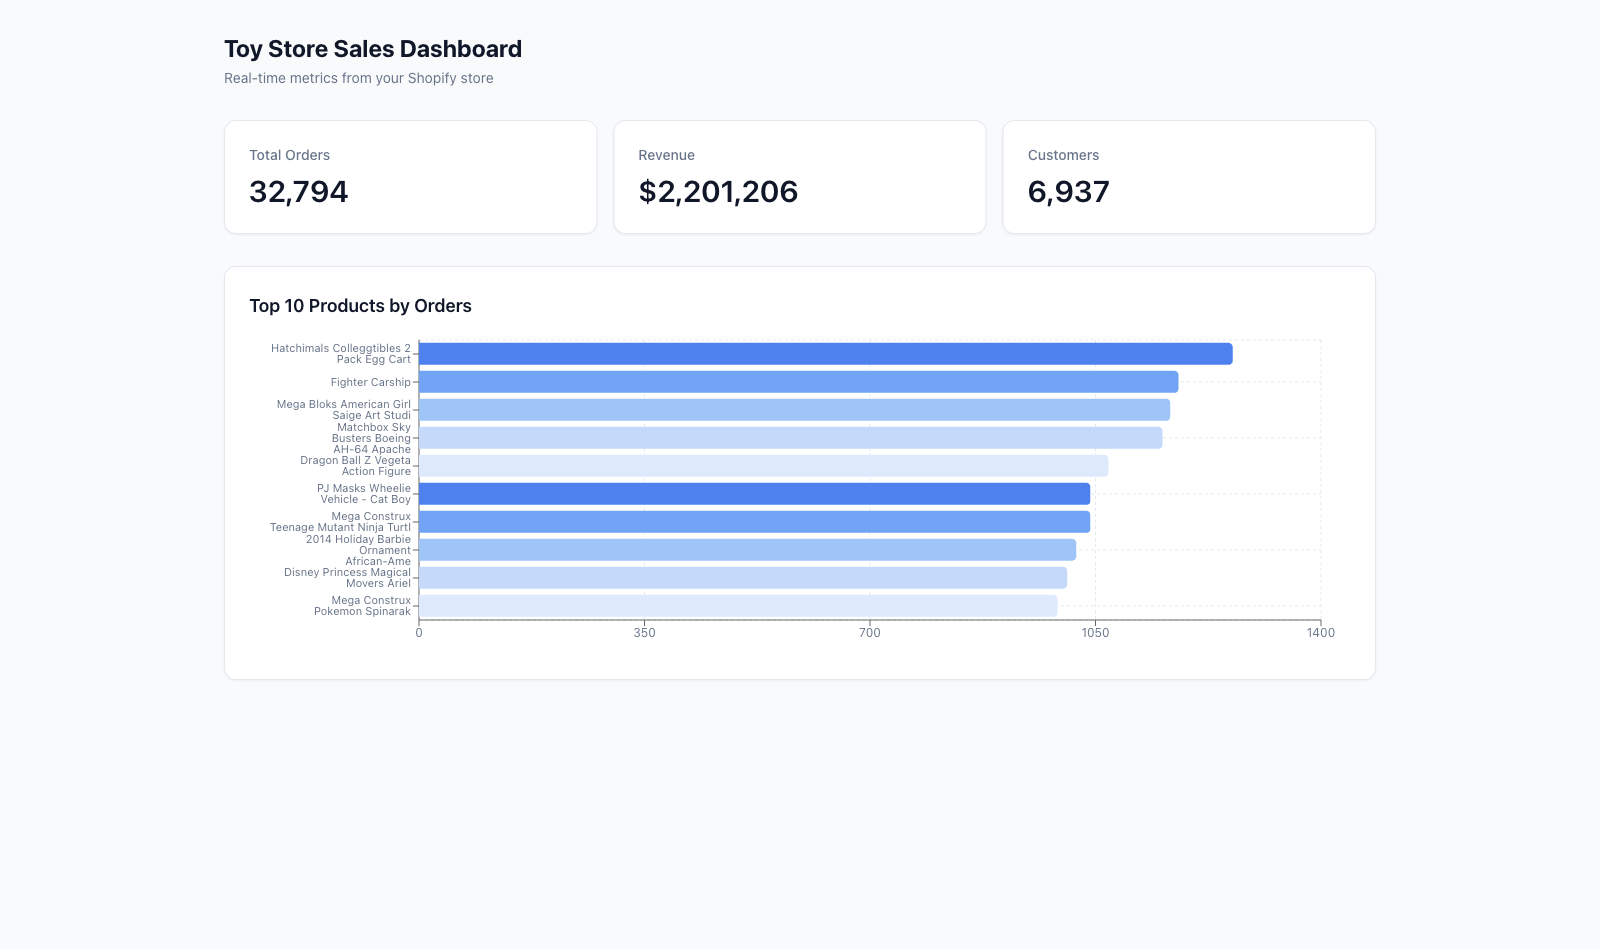
That’s it — you’ve built and published your first app, and you never picked a framework. The sections below cover the mechanics you’ll want as you build more.
What Kai does on its own — and what it asks first
Section titled “What Kai does on its own — and what it asks first”Kai explores your Storage without asking, so it can find the right tables and understand your data. But before it creates or modifies the app in your project, it shows the Confirmation required card and waits for your Approve — click Always allow to skip the prompt for future builds (Tool Permissions gives you the same control centrally). The draft itself is private: nothing is shared until you publish.
How drafts become production
Section titled “How drafts become production”A draft is your private working version with live preview — Kai keeps it on its own branch in the app’s managed Git repository, alongside the production app it created up front. Publish to Production merges the draft branch into main, deploys the production app, and cleans the draft up.
How Kai handles data access
Section titled “How Kai handles data access”Kai uses your data through the project’s access controls — the app can only reach data the project can reach. Read-only access is used by default, so the app can’t change your data unless you ask for write-back.
Create an app manually
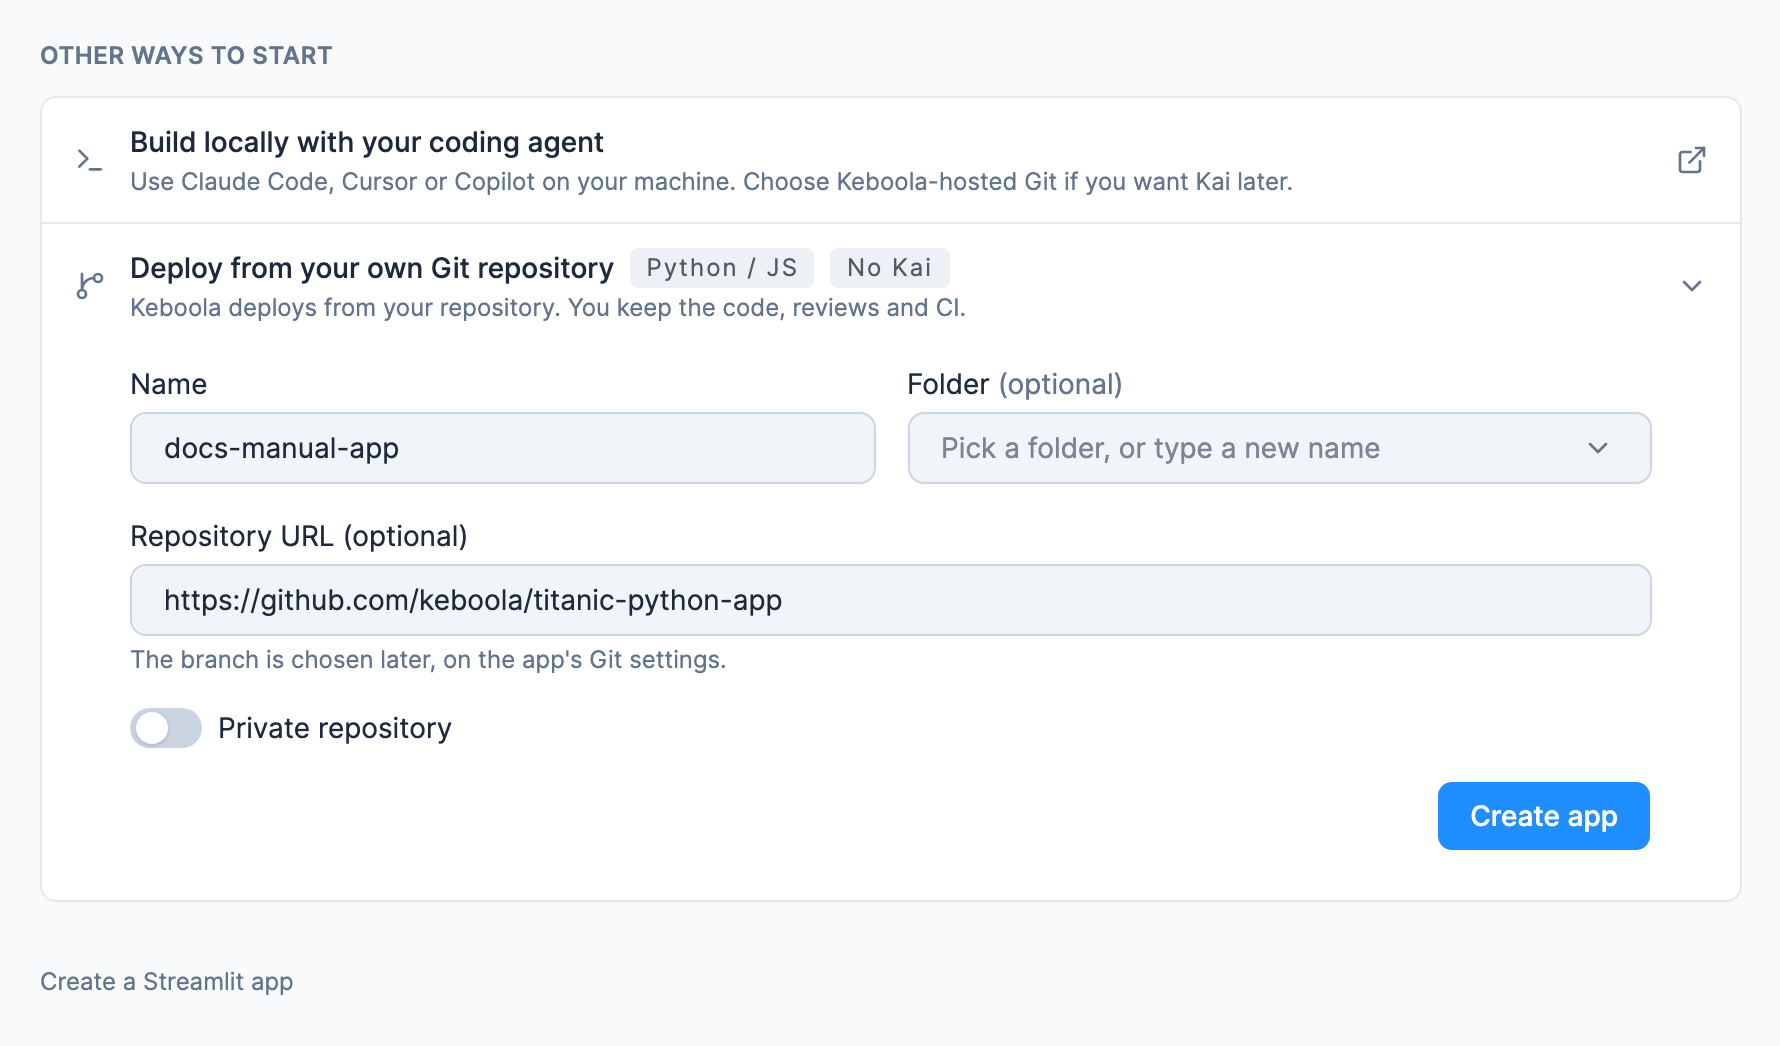
Section titled “Create an app manually”Prefer to set the app up yourself, without the chat? The same Create app screen has two manual routes under Other ways to start: a Python / JS app that Keboola deploys from your own Git repository, and a Streamlit app.
-
In your Keboola project, open Apps and click Create app. A project with no apps yet has no such button; its Apps page shows the choices from step 2 itself.
-
Under Other ways to start, choose the stack:
- Python / JS, for a custom app (what the stack can do): click Deploy from your own Git repository to open its form. The card is marked No Kai because Kai works only with a Keboola-hosted repository.
- Streamlit, for an existing Streamlit app (Streamlit apps): click Create a Streamlit app, the small link below the list.
On a single-tenant stack, the screen may still have the older layout, with a card per stack: click Create Python/JS app or Create Streamlit app. Where only Streamlit is offered, Create app opens the Streamlit dialog straight away.
-
Name the app and click Create app; the other fields are optional. Folder files the app into a folder. On the Python / JS form you can paste the Repository URL now or add it later, and once you type one, a Private repository switch appears for a username and access token, or an SSH key. The app opens on its own page, marked Not Deployed.
-
Add the code and check the Authentication method; a new app starts with Basic (Password) (Authentication covers the others).
- Python / JS: the repository needs a
keboola-config/folder that tells Keboola how to start the app (App structure); there’s no inline-code option. Open the app’s Git Repository card. If you skipped the URL in step 3, enter it as the Project URL, and for a private repository turn on Private and add the credentials. Then click Load branches, pick the branch, and save. - Streamlit: in the Code Source card, choose Code, click Add Code, paste your script and save. Or choose Git Repository and fill it in as for Python / JS; its Main File Path defaults to
streamlit_app.py.
Until the app has code, its App access card says No code yet and Deploy is disabled. A saved repository URL already counts as code, so the card then says Not deployed yet and Deploy is enabled even before a branch is picked; pick the branch before you deploy.
- Python / JS: the repository needs a
-
Configure the rest of the app’s settings; see Reference for the full list. The backend size and the inactivity timeout come next, in the deploy wizard.
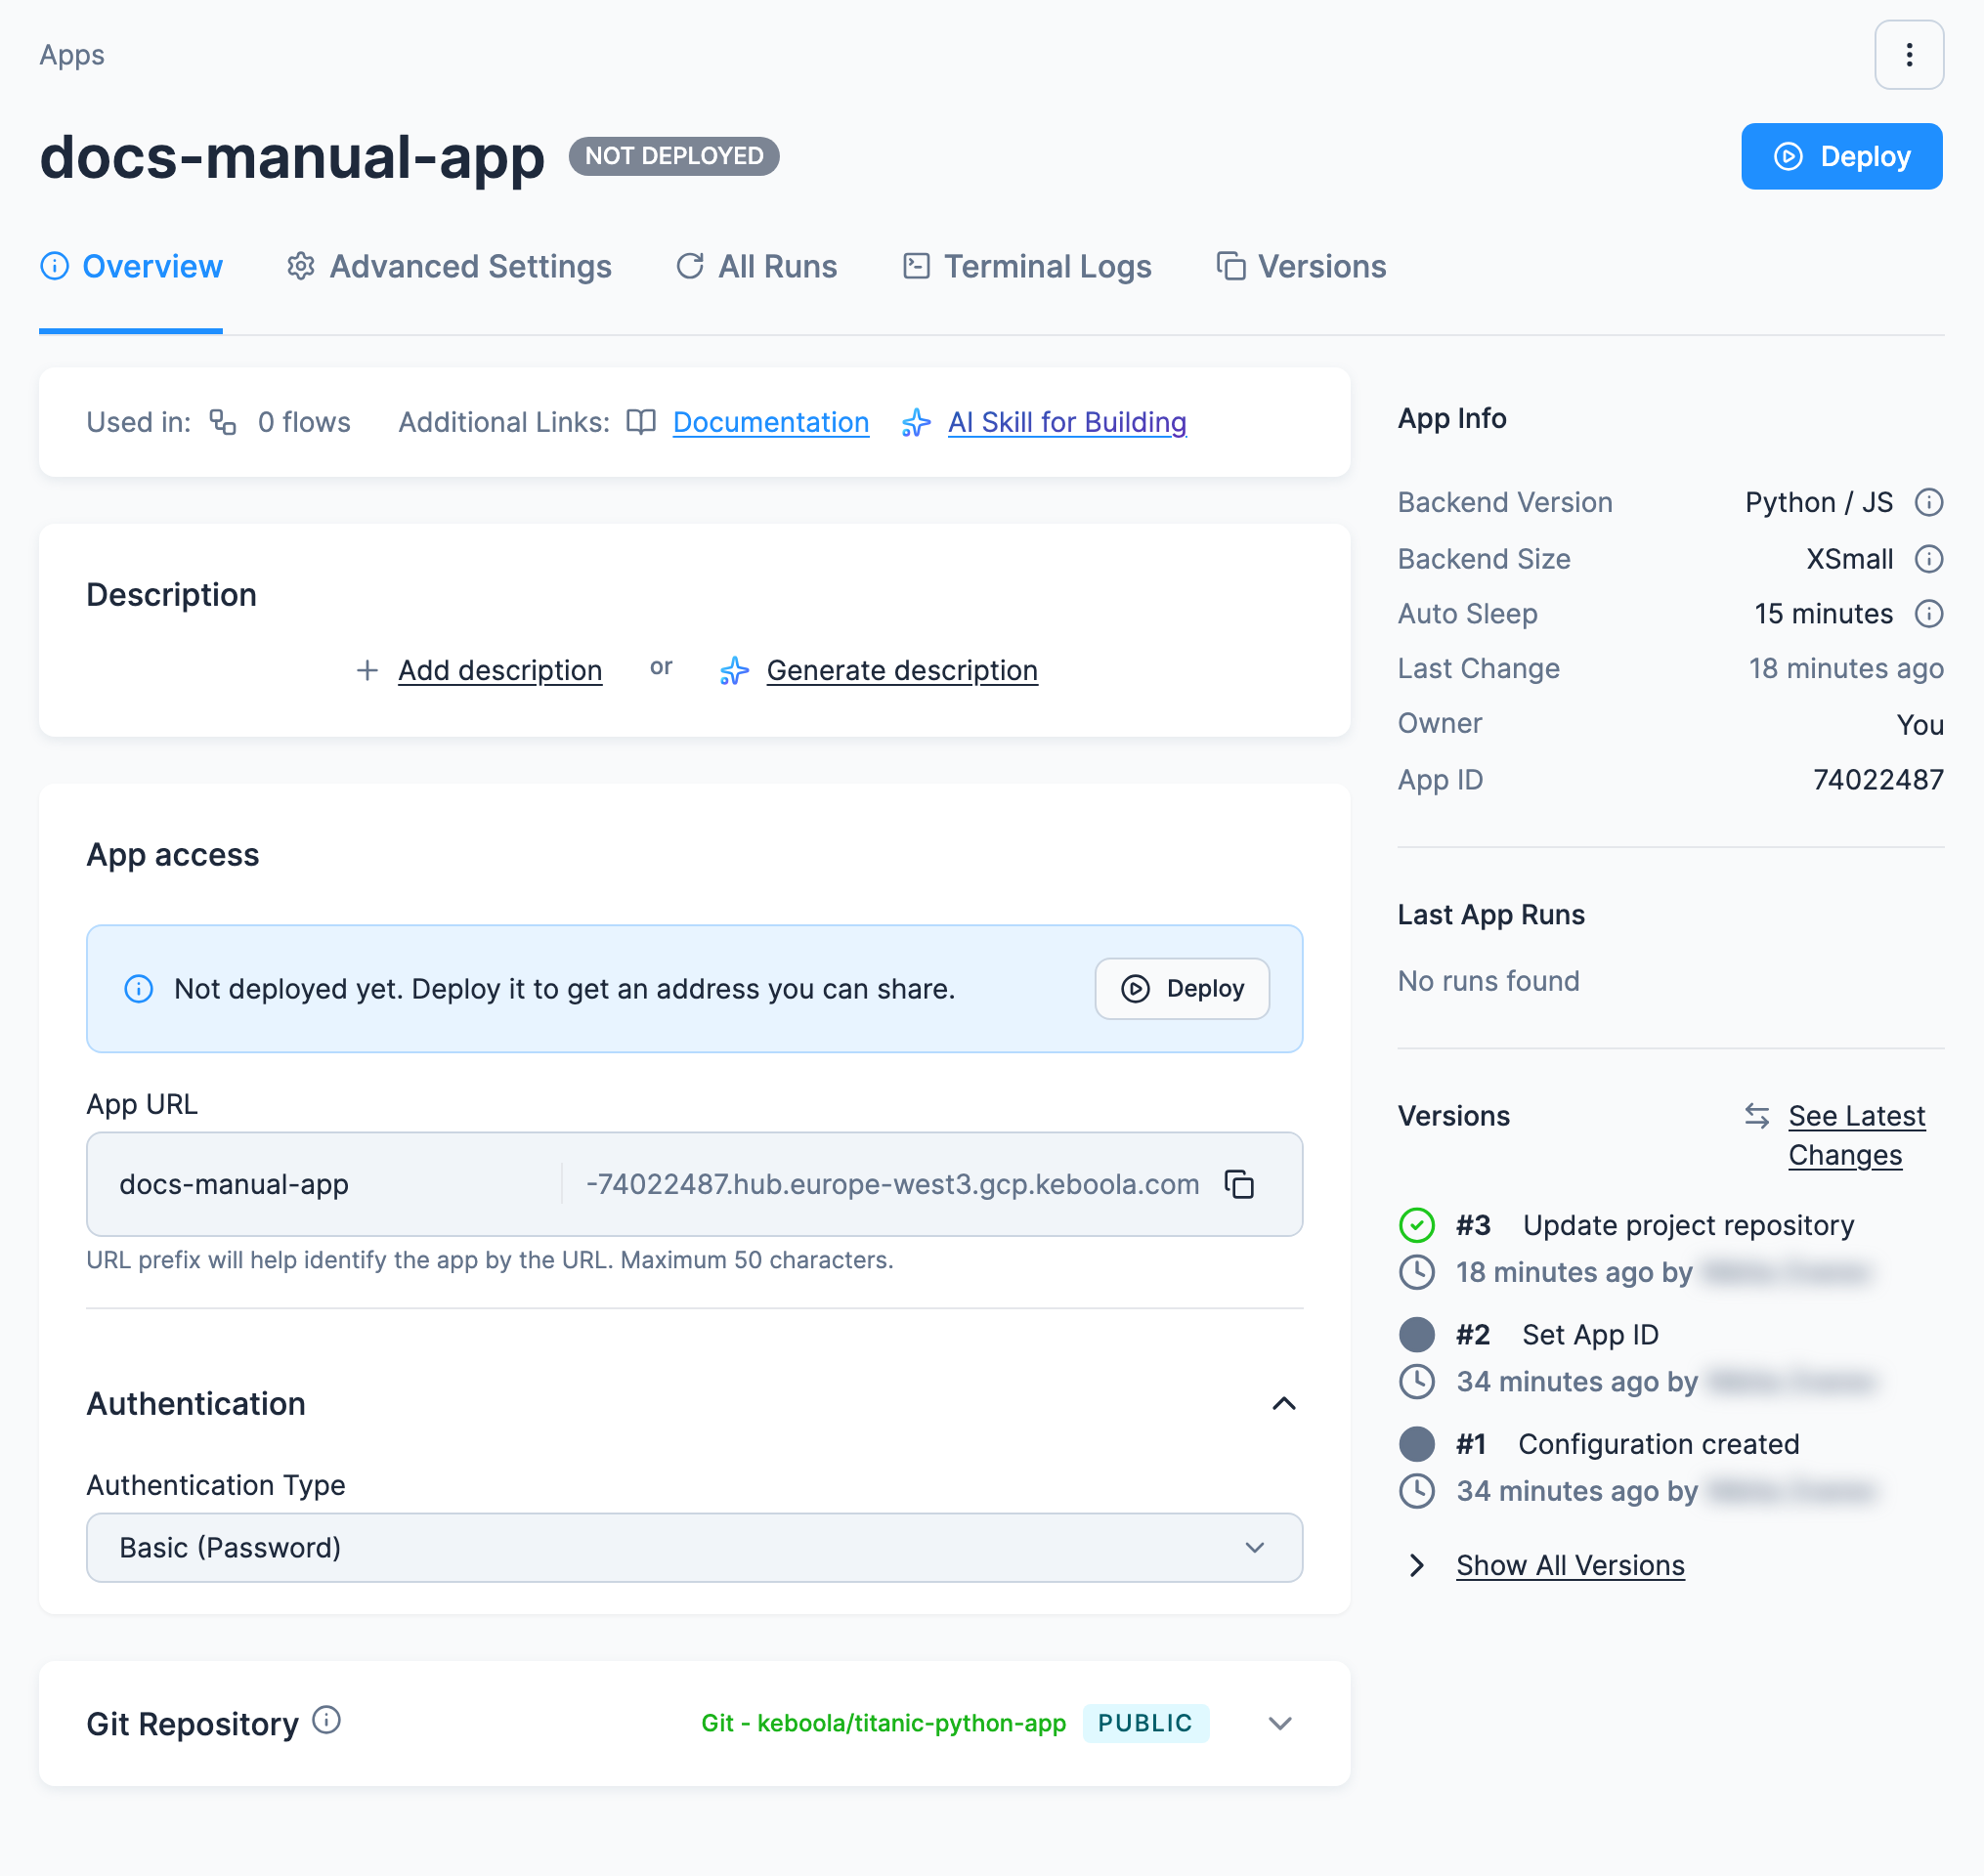
- Click Deploy. A short wizard asks for the backend version, the backend size (not on pay-as-you-go projects) and an inactivity timeout; click Deploy in the wizard to deploy the app. (Redeploy opens the same wizard, with these fields in a collapsed Deploy settings section. Start starts a stopped or sleeping app right away with its saved settings and opens the wizard only when Kai has undeployed drafts of the app.)
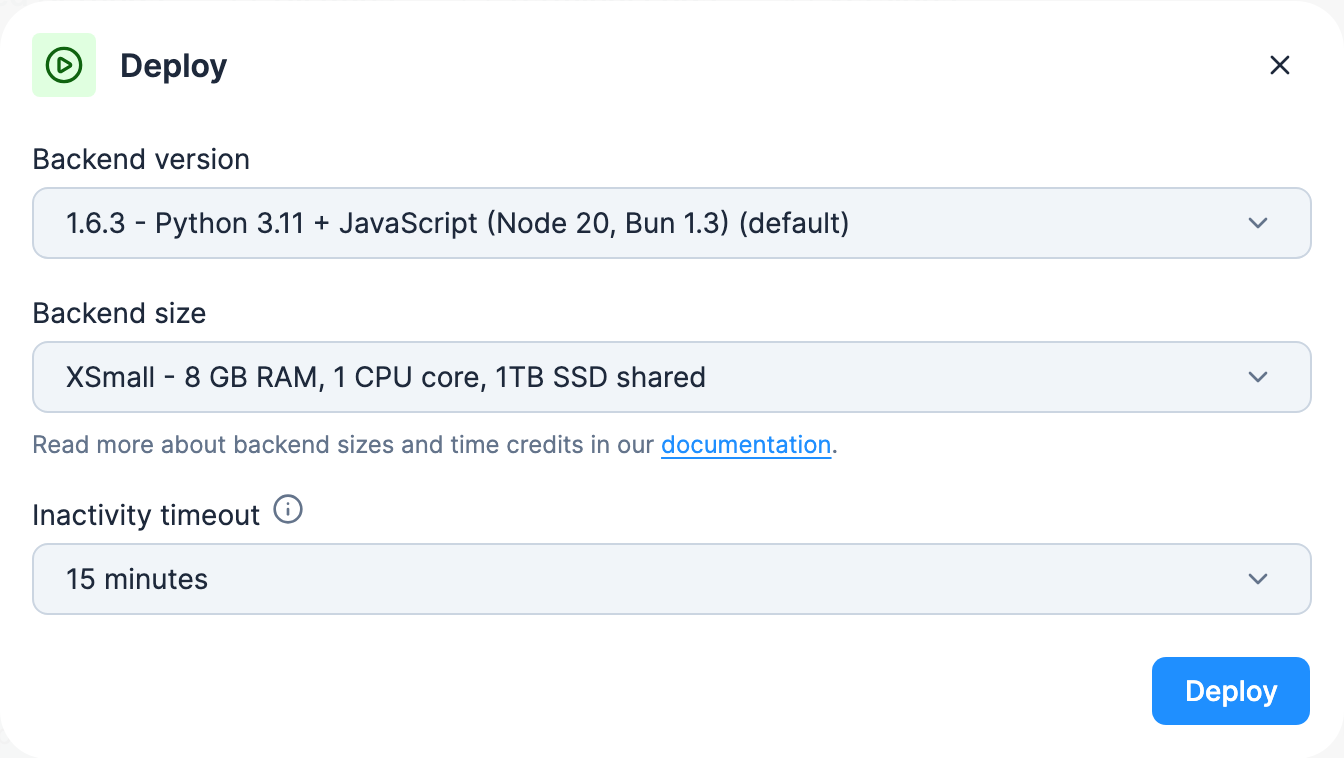
- When the status turns Active, click Open in the page header. The dialog shows the app’s address and, for an app behind a password, the password to copy. Click Open app in it to open the app at its public URL. Use Redeploy (Start if the app is sleeping or stopped) to apply any later config change; see App actions.
From here on, the app is something you run rather than something you build: Operate and update an app covers shipping changes, secrets, sleeping and versions.
Next: Build an app locally →